Showing posts with label recipe. Show all posts

Thursday, January 15, 2015

Around the Table Linkup: 30 Minute Meals

Today, I am co-hosting with The Quiet Place for the Around the Table linkup! This is a linkup where there's a theme for each month; some months may be without a theme. Each month, The Quiet Place and a co-host will share a recipe that we use to create community around our tables. And you will have a chance to link it up! This linkup is currently booked with co-hosts until October, but she is looking to fill spots for November and December. So if you are interested email Britney at: britney.thequietplace@gmail.com for more information!

This month's theme is 30 minute meals! Today, I'm sharing a 30 minute meal that we absolutely love around our house called Garlic Brown Sugar Chicken. 


Ingredients:

4 boneless, skinless chicken breasts
4 garlic cloves, minced
4 tbsp brown sugar
3 tsp olive oil, plus extra to grease dish
salt and pepper, to taste


Directions:


1. Preheat oven to 450 degrees. 
2. Lightly grease casserole dish with olive oil.
3. In a small plan, saute garlic with olive oil until tender. Remove from heat and immediately stir in brown sugar.
4. Place chicken breasts in baking dish and cover with garlic and brown sugar mixture.
5. Add salt and pepper to taste.
6. Bake uncovered for 20-30 minutes.
7. Enjoy!


We serve it with a quick salad and garlic bread usually, and it's delicious! You can also make potatoes or rice to have it with. :) 

Britney is sharing a delicious and easy 30 minute meal on her blog! Head on over there to check it out! :) 

Link-up your 30 minute meals below! We can't wait to see what recipes you all share! :)


Friday, December 12, 2014

Holiday Baking: Chocolate Saltine Toffee


This was a new recipe for me this year, and it turned out so good! When my husband found out the toffee was made with saltines, he questioned it a little. But he agreed that they tasted delicious! And they're so simple!

You'll need: 30 to 40 saltine crackers, 1 cup unsalted butter (2 sticks), 1 cup brown sugar, packed, 1/2 tsp vanilla extract, and 1 1/2 to 2 cups of semi-sweet chocolate chops

Directions:

1. Preheat oven to 350 degrees F. Line a 9 x 13 pan with aluminum foil and spray down with cooking spray. The foil is 100%  necessary!

2. Line saltine crackers in a single layer on bottom of pan.

3. Combine butter and sugar and bring to a boil in pan on the stove. Stir constantly. Once boil is reached, reduce heat and simmer (uncovered) for 3 to 5 minutes or until mixture has thickened. Stir frequently while simmering to avoid bubbling over or burning.

4. Remove from heat after mixture has thickened. Wait 30 seconds and then add the vanilla extract. Stir together.

5. Pour mixture over saltine crackers.

6. Bake for 5-7 minutes or until the toffee has become bubbly.

7. Let rest after removing pan for 3-5 minutes.

8. Sprinkle chocolate chips over toffee mixture and wait 3-5 minutes. This will allow them to melt enough that you will be able to smooth them down with a spatula. You can add other add-ins as this point, if you'd like, such as: nuts, peanut butter chips, etc. I liked it the way it was, but the options are endless!

9. Let cool very well and refrigerate until hardened. Break into pieces. Size is up to you! I had variable sizes at the end, as you can see. Store in airtight container at room temp for up to 2 weeks or in the freezer for up to 4 months (if they can last that long!)!

10. Enjoy!

P.S. I had more pictures of the process, but I accidentally deleted them. Sorry. :( If you need more clarification on the directions, please let me know by emailing me or commenting, and I'll be happy to help!

Hope you love these as much as we did! They're definitely a new Christmas treat staple in our house!

 photo blog2_zpse65e9159.png

Sunday, November 23, 2014

Taco & Fajita Seasoning Recipes + A Lovely Giveaway!!

As I've mentioned many times before, when I first became a wife earlier this year, and we moved across the country, I didn't have a job yet. I was completely focused on being the best wife I could be, saving money, making amazing meals, and doing it all myself. I didn't ever even want to let my husband into the kitchen to cook for me. (Boy, was I ridiculous! That's changed now, by the way--he's the best cook!). I started couponing, making everything from scratch, and I absolutely loved my time in the kitchen. It was during that time that I realized I didn't particularly enjoy store-bought taco and fajita mixes, and it was getting to be expensive. Plus, I always had that moment when you realize you have everything for your meal except the seasoning packet! So, I made my own with a couple of tweaks from recipes from online. I believe they taste better than the store bought, and it's SO much cheaper! Making one batch will give you more than enough for 5-10 meals, and you're only using a little bit of each spice. Next time you have tacos or fajitas (or anything Mexican!), try these out!


Homemade Taco Seasoning

Ingredients:

                       1 tbsp chili powder                                                      1/2 tsp paprika
                       1/4 tsp garlic powder                                                   1 1/2 tsp ground cumin
                       1/4 tsp onion powder                                                   1 tsp sea salt
                       1/4 tsp crushed red pepper flakes                                1 tsp black pepper
                       1/4 tsp dried oregano

Directions:

1. Combine together all spices and store in an airtight container.
2. For each meal, add 2 tbsp (more or less depending on your preferences) to ground beef (or ground turkey for healthier option) along with 1/2 cup of water. Stir together and heat to boiling. After the mixture has started boiling, turn the temperature to low and simmer for 10 minutes until all of water has absorbed.

Homemade Fajita Seasoning

Ingredients:

                     1 tbsp cornstarch                                                           1/2 tsp onion powder
                     2 tsp chili powder                                                          1/2 tsp garlic powder
                     1 tsp salt                                                                        1/4 tsp cayenne pepper
                     1 tsp paprika                                                                  1/2 tsp ground cumin
                     1 tsp white sugar

Directions:

1. Combine together all spices and store in an airtight container.
2. For each meal, add 2 tbsp (more or less depending on your preferences) to ground beef, turkey, chicken, or beef along with 1/2 cup of water. Stir together and heat to boiling. After the mixture has started boiling, turn the temperature to low and simmer for 10 minutes until all of water has absorbed.


As for the other treat of the day, Jenna of A Savory Feast is celebrating her First Blogiversary! She have comprised a team of some incredible ladies and bloggers to giveaway a bunch of amazing items to ONE lucky winner, including: a custom blog button set by MW Stationery, an Oh Simple Joys beautiful mug, some awesome Target kitchen supplies, and a $20 gift card to Target! All you have to do to enter is follow the prompts in the Rafflecopter code below. Each prompt will earn you entries to win! The giveaway will run from today until November 30th at 12:00AM EST, so don't delay!

Happy 1st Blogiversary, A Savory Feast!

A Savory Feast's First Blogiversary Giveaway

Help us celebrate A Savory Feast's 1st Blogiversary with this fun giveaway! The winner will receive a prize pack containing a $20 Target gift card, some baking tools selected by Jenna from A Savory Feast, a custom blog button set from MW Stationery and a mug from Oh Simple Joys.
Meet your hosts!

Blogiversary Giveaway Hosts

This giveaway is open to U.S. residents 18 years of age and older. It runs from November 23, 2014 at 12:00 am EST to November 30, 2014 at 12:00 AM EST. The winner will be chosen randomly and notified via email. They will have 48 hours to respond or another winner will be chosen.
a Rafflecopter giveaway

Good luck!!
 photo blog2_zpse65e9159.png

Sunday, November 16, 2014

Weeknight Meal #3: Oven-Fried Chicken

In my family, we had the tradition of everyone picking their favorite meal on their birthday, and my mom would make it especially for that day (or the following weekend). I'm a meat and potatoes type of girl (that loves veggies, too), so my dad always had a hand in cooking my meal. But, my brothers? They always requested my mom's famous fried chicken. And I have to say, she makes the best fried chicken of anyone I know. I've tried to replicate it a few times, and I've failed miserably. It's one of those, "I'm just going to ask her to teach me how to do that," kinda things because I keep trying, but it doesn't taste like hers.

The downside to having good 'ole fried chicken are those horrible calories that are quadruple the amount that you should have, right? So, I decided to try this recipe that my friend recommended: Oven-Fried Chicken. Almost the same, great taste (even as my mom's!) with a lot less calories. Plus, less work! It's become a staple meal at our house, and after trying it, I'm sure you'll add it to your rotation, too.


OVEN-FRIED CHICKEN
Serves 4

Ingredients:

4 chicken breasts, cut in strips
4-5 tbsp butter
1 cup flour
1/2 tsp salt
1 tbsp seasoning salt
1/2 tsp pepper
2 tsp paprika

Directions:

1. Preheat oven to 400 degrees F. Place butter on a large baking sheet and place in the oven to melt.
2. Combine all ingredients besides chicken in a large ziploc bag. Add the chicken and shake to coat.
3. Take your baking sheet out of the oven once the butter has melted (should only take about 3-5 minutes at most), and place you chicken on it, leaving spaces between each strip.
4. Bake 10-12 minutes, flip with a pair of tongs, and bake another 10-12 minutes.
5. Check to make sure chicken is cooked entire way through either with meat thermometer or by cutting into middle. If not completely cooked through, bake another 5-10 minutes, turning over half way.
6. Remove to a plate lined with a paper towel, and soak up any excess grease. 
7. Serve and devour! :) 

Prep time: 15 minutes
Cooking time: 20 minutes

Adapted from here!

We usually serve it with green beans and mashed potatoes, but the possibilities are endless with this meal. With this dish, you'll forget all about making real fried chicken!


Remember: Tomorrow is the last day to enter the Christmas Book Giveaway! If you haven't entered yet or don't feel like you have someone to gift them to, consider giving them to an Adopt-An-Angel program at Christmastime! You'll make one (or a few) children's days!

 photo blog2_zpse65e9159.png

Friday, November 14, 2014

Weeknight Meal #2: Crockpot Philly Cheesesteak Sandwiches

My husband LOVES Philly Cheesesteak Sandwiches. Like possibly more than he loves me. Okay, that's over exaggerating a little, but we always have to try out a restaurant if they are rumored to have a good Philly. Combined with my love for easy meals and crock pot recipes, this recipe was sure to be a winner for the two of us. It definitely didn't disappoint!


SLOW COOKER PHILLY CHEESESTEAK SANDWICHES
Recipe makes 4 servings

Ingredients:

1 1/2 lbs beef round steak
1 green pepper, thinly sliced
1 medium onion, thinly sliced
1 can beef broth
1 pkg Italian seasoning mix
4 hoagie buns
Provolone cheese slices 

Directions:

1. Spray crock pot with non-stick cooking spray.
2. Cut meat into strips and place in crock pot.
3. Add green pepper, onion, broth, and Italian seasoning packet to slow cooker.
4. Cover and cook on low for 7-8 hours (or high for 3-4 hours).
5. Toast bread in a 375 degree oven for 5-10 minutes.
6. Spoon meat mixture onto toasted bread.
7. Cover with cheese and bake an additional 5 minutes to melt the cheese. 

Recipe adapted from here!

Hope you love it as much as we do! :)

Also, if you haven't packed a box for Operation Christmas Child, yet, visit here to learn how to do so! Packages must be mailed by November 24th!

The Christmas Book Giveaway is still going on until Monday! If you haven't entered, yet, you still have time!


 photo blog2_zpse65e9159.png

Sunday, November 9, 2014

Weeknight Meal #1: Chicken Spaghetti

How many of you wonder day after day what you are going to make for dinner that night? You go to work and spend hours trying to find a recipe that requires ingredients you have and isn't going to take hours. I've been there. That's why I had to be a little more organized. I love using this Meal Planner & Couponing Tracker. It's simplified life more than I can even explain. With our 30+ rotating meals and always adding Pinterest finds, I never run out of things to make. Today's featured Chicken Spaghetti is adapted from the Pioneer Woman's recipe, and it's truly delicious. And EASY! My husband was skeptical when I first told him what I was making (and when I told him it didn't contain tomato-based sauce), but we both loved it, and leftovers for lunch the next day were just as good.


CHICKEN SPAGHETTI

Ingredients:

chicken (any cut), around 1 1/2 cups
1/2 box thin spaghetti
2 1/2 cups shredded cheese (I used Monterey Jack & Cheddar)
1/4 cup finely diced green bell pepper
1/4 cup finely diced red bell pepper
1 tsp season salt
1/4 tsp cayenne pepper
2 cans cream of mushroom soup
1 finely diced medium onion
salt, to taste
black pepper, to taste

Directions:

1. Preheat the oven to 350 degrees F.
2. Fill a large pot with water and bring to a boil. Cook chicken either by boiling (if using whole chicken pieces) and removing off the bones, or by cooking by method of your choosing. 
Note: I used chicken breasts, cooked by steaming them (technique to come later on the blog, but baking would be another option!), and then cut up into 1/2 inch cubes. Save the chicken broth. It adds flavor when cooking the spaghetti!
3. Cook the spaghetti in the chicken cooking broth, if you'd like, or in boiling water until it is cooked firm to the bite. Don't overcook!
4. When spaghetti is cooked, combine with chicken, 1 1/2 cups of the cheese, green pepper, red pepper, season salt, cayenne pepper, mushroom soup, and onions. Sprinkle with salt and pper.
5. Stir in 1 cup of the reserved chicken broth (or as much as you have from cooking your chicken). If you do not have any, that is fine, too. It just adds to the flavor.
6. Place the mixture in a casserole dish and top with the remaining cup of cheese. Bake until bubbly, around 45 minutes.

This meal makes around 4-6 servings, so it's perfect for a family, or for a couple with plenty for lunch the next day! Enjoy!

More delicious weeknight meal recipes to come!

 photo blog2_zpse65e9159.png

Saturday, November 8, 2014

Caramel Apple Kiss (Drink Recipe)

One of my favorite parts of fall is being able to cuddle up in a nice comfy sweater and drink a warm beverage. My choice is almost always hot apple cider, so when my husband and I visited a new local brewery that was also featuring this delicious drink resembling apple cider, I knew I had to re-create it. I may not have done as good of a job as they did, but it tastes pretty good to me and got the seal of approval from the hubs. :) If you're looking for a delicious drink that reminds you of fall, this one will be perfect!


CARAMEL APPLE KISS
Yields One Drink

Ingredients:

3 tbsp caramel vodka
1/2 cup apple juice
1 tsp cinnamon
1 tsp lemon juice

1. In a shaker cup, add ingredients and shake for 30 seconds until all ingredients are combined.
2. Pour into martini glass.
3. ENJOY!
*Optional: To make this even more yummy, dip the rim of glass in brown sugar and garnish with an apple slice. :) 

One more reason to love fall. ;)

 photo blog2_zpse65e9159.png

Friday, October 31, 2014

All Hallows Eve Means Tricks and Treats!

HAPPY HALLOWEEN, friends!!!

I've been making Halloween cupcakes and treats every year for as long as I can remember. I used to make them for our church's Halloween carnival, and I truly missed it when I moved away. So, I made them for work parties or just to bring to friends. I thought I would share a few I've made and the links to how to make them today!

Image Map

From top left, clockwise: Bloodshot Eyeball Cupcakes, Rice Krispy Pumpkins, Mummy Cupcakes, Spider Cupcakes, Brain Cupcakes, RIP Graveyard Cupcakes, Witches' Brooms, Dismembered Zombie Cupcakes

You can click on the name or each picture to be taken to a link that will show you how to make it (or a similar treat)!

Sorry about the picture quality. Some are from old film pictures, some are from the phone, etc. I've always loved creating fun Halloween treats, even if they didn't turn out the best. So, here's some ideas for you for tonight (if you're staying in and making a treat while passing out candy) or for next year!

Happy Halloween, and be safe, friends!

 photo blog2_zpse65e9159.png

Thursday, October 30, 2014

Pecan Cheesecake Bars (Recipe)

I've been a little absent to the blogging world lately. I'm sorry for that. Life has been crazy but in a good way. So many projects at work and always something going on at home, too. I absolutely love it, but I promise I'll be better at updating and posting soon. :)

There's been no absence of cooking and baking in this house, though. There's always something I want to try, and my husband and I are constantly in the kitchen. We made these Pecan Cheesecake Bars last week, and they were so good. Not too sweet, but just enough to fulfill that sweet tooth! You have to try these!


PECAN CHEESECAKE BARS

Ingredients:

Crumb Mixture:

2 cups all-purpose flour
2/3 cup firmly packed brown sugar
2/3 cup butter, softened
3/4 cup chopped pecans

Filling:

2 8-oz packages cream cheese
1/2 cup sugar
1/3 cup milk
1 tsp vanilla

Directions:

1. Preheat oven to 350 degrees Fahrenheit.
2. Combine flour, brown sugar, and butter in large bowl. Beat at low speed or by hand slowly until mixture resembles coarse crumbs.


3. Stir in pecans and reserve 1 1/2 cup crumb mixture to set aside.
4. Press remaining crumb mixture onto bottom of ungreased 8-in square baking pan. Bake 12-15 minutes or until lightly browned.


5. While bottom crumb mixture is baking, combine all filling ingredients in small bowl. Beat at low spread or by hand slowly until well-mixed, about 2 minutes.
6. Spread filling over partially baked crust while still hot.


7. Sprinkle remaining crumb mixture over filling and press into filling lightly.
8. Continue baking 30-40 minutes or until filling is set. Cool completely. Cut into bars. Store in refrigerator.


Makes 9"x13" pan - approximately 18 2-inch bars.

Adapted from here!

Enjoy!

 photo blog2_zpse65e9159.png

Monday, October 6, 2014

Fast & Delicious: Pumpkin Dip Recipe

As you all know, I love everything pumpkin. I have posted about my pumpkin crunch many times here on this blog, and it's been my staple dessert for the fall. But the other day, a friend of mine brought over this amazing pumpkin dip for dessert, and I had to recreate it. It was so, so good! Thought I would share the recipe with you all!

PUMPKIN DIP

Ingredients:

1 container of frozen whipped topping (16 oz), thawed
1 small pkg vanilla pudding mix
1 can pumpkin (15 oz)
1/2 tsp cinnamon
1/2 tsp pumpkin pie spice


Directions:

1. Combine all above ingredients together. Chill in refrigerator until serving. & Enjoy!

It's as easy as that, and it's incredibly good. I think it's best served with vanilla wafers, but some say they prefer it with cinnamon graham crackers. I think both would be great, and I think it would be good as a pie filling, too (just a little twist on a pumpkin pie)! 


 photo blog2_zpse65e9159.png

Tuesday, September 16, 2014

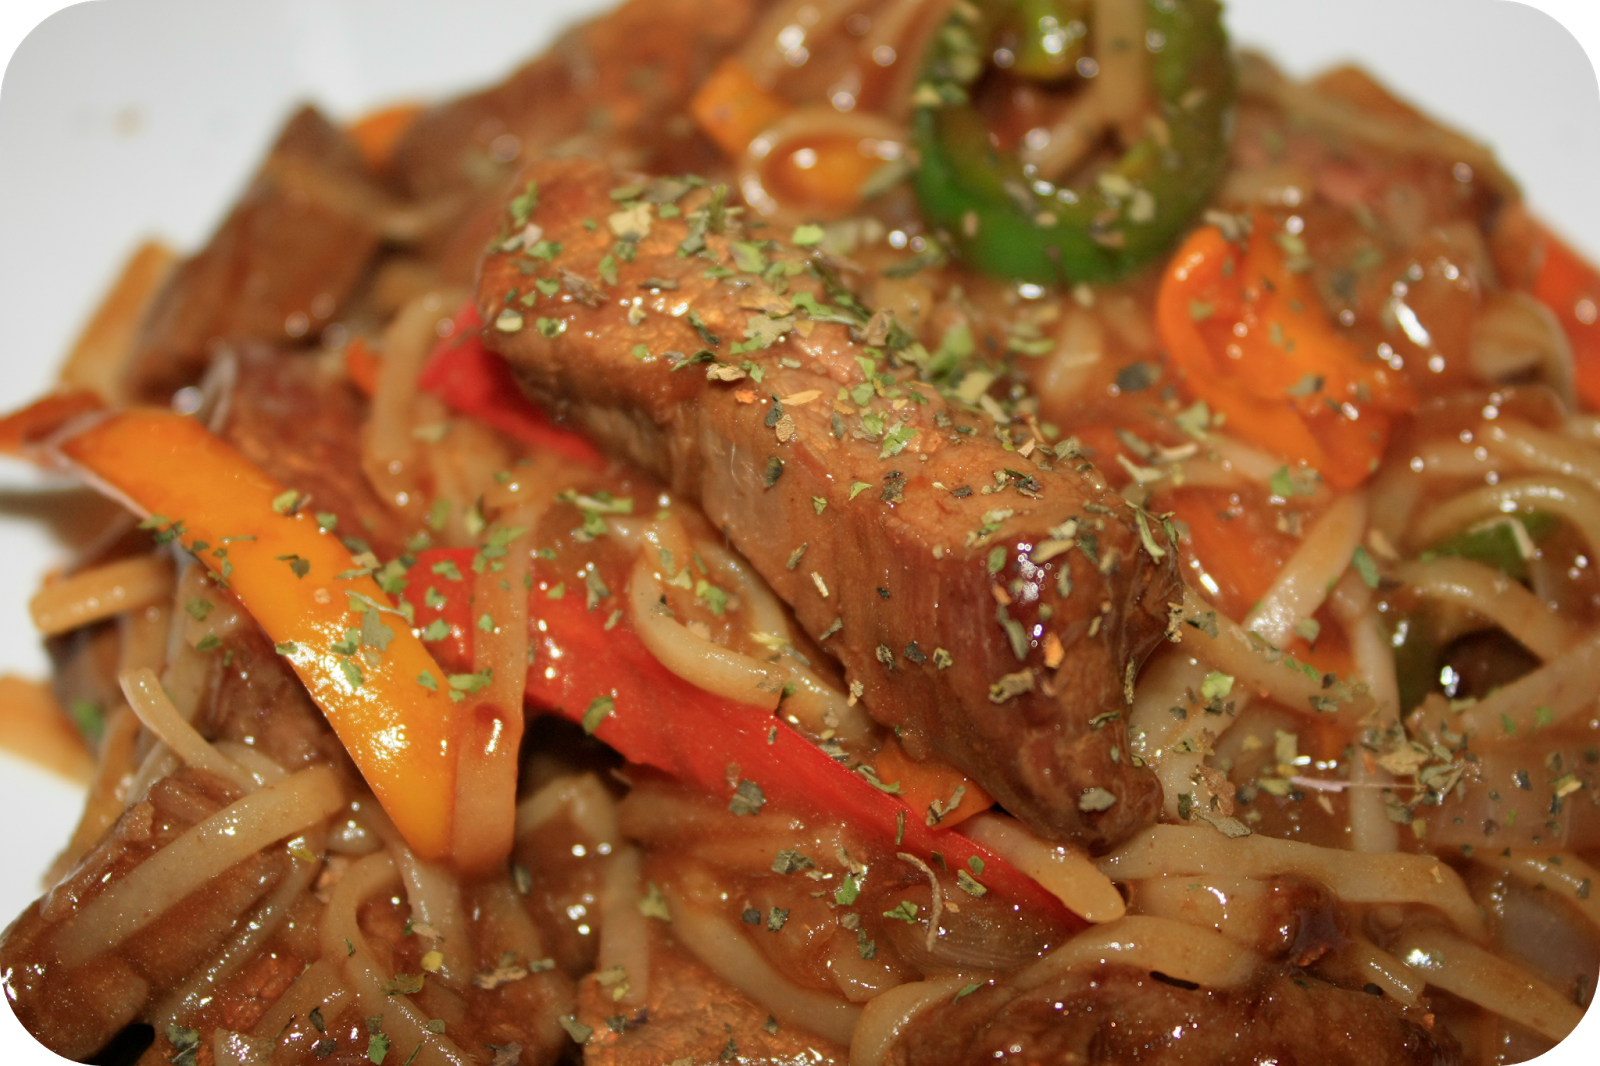
Thai Beef & Peppers Recipe

My husband and I love trying all different types of food. Mediterranean, Thai, Chinese, Hawaiian, etc. You name it, we love it. I never used to be that way, but my tastes have definitely expanded. A couple of weeks ago, we were watching the Food Network (it's commonly on in our house since both of us love to cook, especially me), and we watched Ree Drummond, "The Pioneer Woman," make an incredible Thai dish in her "Around the World" segment! I decided to give it a try and have adapted it a little, mostly because the last time I made it, it was toooo spicy! And that's coming from someone who loves spice! So, here's my version of Thai Beef & Peppers!


THAI BEEF & PEPPERS

Ingredients:

1 pkg pad Thai noodles
2/3 cup soy sauce
3 tbsp cooking sherry
2 tbsp brown sugar
2 tbsp cornstarch
1 tbsp ginger
1/4 tsp red chili oil
2 cloves garlic, minced
1 lime, halved
1 lb flank steak
2 tbsp vegetable oil
1 yellow onion, sliced thinly
1 green bell pepper (or other colors, I used yellow, red, and green), sliced thinly
1/2 tbsp sliced jalapeno
basil for garnish
cilantro for garnish

Directions:

1. Cook the noodles in pot of boiling hot water.
2. Mix soy sauce, cooking sherry, cornstarch, brown sugar, ginger, chili oil, garlic, and juice of half life in small bowl.
3. Slice flank steak very thinly (about 1/2 inch sections).


4. Pour third of above marinade into bowl with sliced beef and toss to coat. Reserve the rest of the marinade for later.
5. Heat 1 tbsp of oil in large skillet over medium to high heat. When thoroughly heated, cook onions for 1 minute. Add the bell peppers and jalapenos and cook for 1 minute until peppers are slightly browned. Remove the vegetables and place on plate aside.


6. Add 1 tbsp of additional oil into skillet that was used for vegetables. Add the meat mixture, allowing it to cook for 45 seconds. Then, turn the slices of steak and allow to cook for another 30 seconds. Add the vegetables back to skillet and reduce the heat to low. Pour the rest of the marinade into the mixture and stir. After allowing to simmer for 4-6 minutes, the sauce should thicken. If not, add an additional tbsp of cornstarch. When it has reached the consistency desired, turn off heat.
7. Drain the noodles and add to stir fry. Stir in hot water if needed to thin sauce.
8. Top with basil and cilantro and add the juice of lime to top.
9. Enjoy!


Adapted from: http://www.foodnetwork.com/recipes/ree-drummond/thai-beef-with-peppers.html

Hope you love it as much as we do!

 photo blog2_zpse65e9159.png

Thursday, September 11, 2014

Pumpkin Crunch Recipe

Does anyone else feel like it takes them a whole week to recover from traveling? Thankfully, the air conditioner at work needed some part to be replaced, so I walked in this morning, not feeling the best admittedly, and I almost walked straight out because it felt like a July day in that building. I always say I'm more productive working from home, and today has been no exception. I've even caught up on some laundry, cleaning, and unpacking from last weekend. Yes, I'm a little slow this week, and the husband keeps pointing to my suitcases and sighing... maybe today he'll be surprised when he gets home?

Last night, my husband and I went to a friend's birthday party, and because I'm a typical girl, I love all things fall and PUMPKIN! So, I decided to bring one of my favorite fall desserts. I wait for the opportunity to make this dessert every year because my mom always made it for us. And yes, it's that dessert that I can sit down and eat a whole dish of myself in one sitting (well, maybe not that fast). It was a hit last night, so I thought I'd share this incredibly simple recipe with you all, so you can enjoy the pumpkin and fall deliciousness as much as I do (and did again for breakfast this morning). :)

PUMPKIN CRUNCH

Ingredients:

1 large can pumpkin puree (29 oz)
1 can evaporated milk (12 fl oz)
4 eggs
1 1/2 cups white sugar
1 tsp pumpkin pie spice
1 tsp cinnamon
1 tsp salt
1 pkg yellow cake mix (around 18 oz)
1 cup chopped pecans
1 cup margarine, melted
1 container whipped topping (8 oz), optional

Directions:

1. Preheat oven to 350 degrees F. 
2. Lightly grease one 9 x 13 inch baking pan.
3. In large bowl, combine pumpkin, evaporated milk, eggs, sugar, pumpkin pie spice, cinnamon, and salt.


4. Spread into greased pan.
5. Sprinkle cake mix over top of pumpkin mixture evenly and pat down.
6. Sprinkle chopped pecans evenly over cake mix.
7. Drizzle melted margarine on top of cake mix and pecans.


8. Bake for 1 hour or until golden brown.


9. Optional: Top with whipped topping or serve on the side. (I decided not to for this one!)

P.S. I wanted to do a post on 9-11 today, but so many captured it much better than I ever could have. A special shout out to this post that you should check out at CommuniKait. That being said, we can truly never forget, and all of my love and respect goes out to those who fell that tragic day and since, as well as those who are constantly putting their lives on the line for our freedom. We can never truly thank you enough, and we, as a country, honor you.

 photo blog2_zpse65e9159.png

Wednesday, August 13, 2014

Healthy and Delicious Waffles

My husband is the best cook. He is great with adding seasoning and improvising, and he always comes up with the best meals. For the longest time, he did most of the cooking, as my schedule was crazy at work (and I think I may have enjoyed having him make me dinner all the time... :)). But, when we got married, I knew I wasn't going to be working for a couple of months after moving here, so I made it my goal to come up with as many delicious recipes as possible and be as organized as I could in my approach to cooking, shopping, meal-planning, etc. It's worked out well, and I can't wait to see if I can balance it one day when I have little ones running around. I'm pretty sure that will be when it falls apart, but for now, I can feel good about it. :)

When I cook, I try to make the healthiest decisions possible because I definitely have a sweet tooth and an eye for the unhealthy foods, and that's fine at times, but for day-to-day meals, it makes me feel much better to have them be as wholesome and good-for-you as possible. That's why when I had a craving for waffles the other day, I took a recipe for traditional waffles and turned them into low-fat waffles that tasted just as delicious as the real thing. I did top them with a little confectioners' sugar, however. All things in moderation, right? I hope you enjoy them, and feel free to make adjustments to fit the recipe to your needs and things you have on hand!


Healthy and Wholesome, Delicious and Fluffy Waffles

Prep time: 10 min, Cook time: 15 min

Ingredients:

2 eggs
2 cups whole-wheat flour (This is where I cheated this time. I didn't have any on hand, so I used regular all-purpose, so they were not as good for you as they could be. But, I have done them before just as the recipe states, and they were just as amazing!)
1 3/4 cups skim milk
1/2 cup applesauce, unsweetened
1 tbsp sugar substitute (I used baking Splenda)
4 tsp baking powder
1/2 tsp salt
1 tsp vanilla extract
1/2 tsp cinnamon (or to taste)

Directions:

1. Preheat waffle iron. 
2. Separate egg yolks from egg whites. Beat egg yolks in large bowl. Put egg whites in separate bowl and set aside.
3. Adding to large bowl with egg yolks, beat in flour, milk, applesauce, sugar substitute, baking powder, salt, vanilla, and cinnamon. I used my kitchen aid mixer for this, but by hand works as well!
4. Use hand beater or beating vigorously, beat egg whites until fluffy.
5. Fold egg whites into batter.
6. Spray preheated waffle iron with non-stick cooking spray. Pour mix onto hot waffle iron. Cook until golden brown, about 2-3 minutes. 
7. Top with cinnamon, confectioners' sugar, syrup, butter, or fruit (or anything else you would like!). Enjoy!

Adapted from here!

Hope you are all having an amazing week, my friends, and just remember, two days until the weekend!

Love,

 photo blog2_zpse65e9159.png

Thursday, July 31, 2014

Sopapilla Cheesecake Bars

Everyone needs a pick-me-up to get through the week. There's no better thing sometimes for a difficult week (in my opinion), than to just spend an evening baking. Last night I enjoyed a low-key night with my amazing husband who needed it because he had a written certification exam coming up today for his job. (GOOD LUCK, BABE!). I was hoping to have a delicious dessert made for last night to enjoy before he went to bed, but I failed. We instead rode bikes for an hour or so, made dinner (I'll share that recipe later because it turned out delicious), and spent a couple hours just hanging out on the couch with him and our pup watching our Netflix show of choice right now (Prison Break), which we are loving. We try to watch a series a couple times a week together until we're done and then start a new one (Burn Notice and How I Met Your Mother are our favorites we've completed so far!). We're not very good at staying up with on-going shows, though. We always seem to watch them after they have gone completely off air, ha ha. Oh well. It's fun for us. :) Any suggestions for other series to start after this one? Anyway, I ended up starting baking after he had already gone to bed because I got caught up in the show. I have a friend that is leaving the lab today, so I decided that I would make a couple different desserts and then have half for us and half for my co-workers. It was incredibly fun and relaxing, and baking/cooking probably always will be for me. :) It's one of my favorite things to do. I love to sit down and plan out meals for a couple weeks (rotating through our favorite recipes and adding in new ones I find on the internet (blogs/pinterest) or from our cookbooks and add it to our rotation). I do a lot of crock pot recipes, as well, which I will share with you one of these days! :) For now, on to one of my favorite desserts that my husband actually started making. He made it for a party with our friends for Cinco De Mayo a year ago (isn't he awesome--a husband that bakes and cooks as much as I do sometimes!), and it has been a staple in our house for when we're craving something delicious.

For today, I am linking up with Katherine's Corner, Over Fifty Feeling 40, and Vintage Mama for Thursday's Favorite Things! You can find a ton more amazing things that other blogs have linked up here! My "Thursday's Favorite Things" are these Sopapilla Cheesecake Bars that I made last night, along with Turtle Chocolate Chip Cookies (recipe for that later, as well!).


Sopapilla Cheesecake Bars - these are amazing, divine, cheesecake filled dessert bars. If you like cheesecake, you will love these! The best part is most of the ingredients are usually staples around the kitchen if you like to bake!

Ingredients you will need:

3 (8 oz) packages of cream cheese (I actually only used 2 to cut down a little bit, and they still turned out great!)
2 cups white sugar total (1 1/2 for first part of recipe; last 1/2 cup for the top!)
1 1/2 teaspoons vanilla
2 (8 oz) pkgs of crescent rolls (I used Kroger brand, which worked just as well as Pillsbury brand has in the past!)
1/2 cup melted butter
1 tbsp ground cinnamon
1/4 cup sliced almonds (optional--I didn't use these for mine last night and preferred them without, so it is entirely up to your tastes!)

Recipe: 

1. Preheat your oven to 350 degrees Celsius.
2. Beat the cream cheese with 1 1/2 cups of sugar and the vanilla extract in a bowl until completely smooth (whipped consistency).
3. Unroll the cans of crescent roll dough. Lay and press the dough on the bottom of a 9x13 inch baking dish (glass is preferred). Pinch the individual triangles together and spread the dough into the the seams of the dish. Note: You will want the dough to be as consistent and without breaks as possible.
4. Evenly spread the mixture of cream cheese, sugar, and vanilla over the baking dish.
5. Cover with the remaining pieces of crescent dough, and again, make sure to seal all the breaks in the individual pieces together creating one flat sheet of dough on the top.
6. Drizzle the melted butter evenly over the top of the cheesecake.
7. Mix the last 1/2 cup of sugar with the cinnamon in a small bowl and then sprinkle over the butter mixture. At this point, you can add the sliced almonds on top if you would like.
8. Bake in the preheated over until the dough has turned golden brown for about 25-30 minutes.
9. Cool completely in the pan (about 20 minutes).
10. It is easiest to cut after being refrigerated (preferably overnight).
11. Enjoy!


Adapted from here!

Hope everyone is having a good day! The week is almost over, which is the reason I'm getting through each day. It's been a rough week, but these made it better, and if you have time to try to make them, I think you'll feel the same way! Happy Thursday everyone!

Love,

 photo blog2_zpse65e9159.png

Much Love!

Much Love!

Share